Software Engineer
Hello again — Malcolm here!
Let me briefly introduce myself. I am originally from North Carolina, a state which lies in the southern part of the United States. In 2015, I graduated from Cornell University with a Bachelors of Arts in Computer Science. Regarding my professional experience, I have worked on a variety of software engineering projects at companies such as Apple, Wayfair, Amazon Japan, and LINE. Some of my work has even been featured in news sites like TechCrunch Japan! Anyone who would like to learn a bit more about my academic and work history, please feel free to have a look at the most recent version of my résumé.
Currently, I am based in Tokyo, Japan, where I have been a resident for the past seven years. Living and working abroad has always been a dream of mine and every day has certainly been an adventure! I enjoy a mix of domestic and international travel (I’ve visited 20 countries so far), art and history museums, weightlifting, learning Japanese, amateur photography, wine tasting, and — as you can see — most recently winter sports! Please don’t hesitate to drop me an email or send me a message on LinkedIn if you’d like to get in touch with me!
Back in 2016, there were not many easy and convenient ways to order over-the-counter class one medicines online in Japan. To explain briefly, class one is a special designation of drug, in which a pharmacist must approve the use of before sale.
The general flow is such: if one is experiencing symptoms of disease, he or she would first would go to a doctor to correctly diagnose the issue. The doctor, after performing tests on the patient, would, in turn, present to the patient a script, which would be presented to a pharmacist. Once the script has been handed over, the pharmacist would double-check the drugs and dosages and finally give the patient the required drugs. Going through this process is, indeed, time-intensive and moreover, the patient can become quite distressed especially if the illness is a sensitive matter. I firmly believe that doctors and pharmacists alike should never shame or berate their patients for their illnesses or situations, but sadly this is not always the case. I am proud to have worked on a project that helps people to get the medical help that they need anonymously and online–and–without shame.
If you ponder a bit, an interesting question begins to emerge: how would you automate a manual process like this?
Legally, such a process can not be fully automated, precisely because a licensed pharmacist must be involved strictly before the drugs are distributed to the customer. In order to satisfy the legal requirements, Amazon Japan had to hire several pharmacists full time just for this project. What can be automated, however, is the creation and transmission of a patient’s medical data for review by pharmacists.
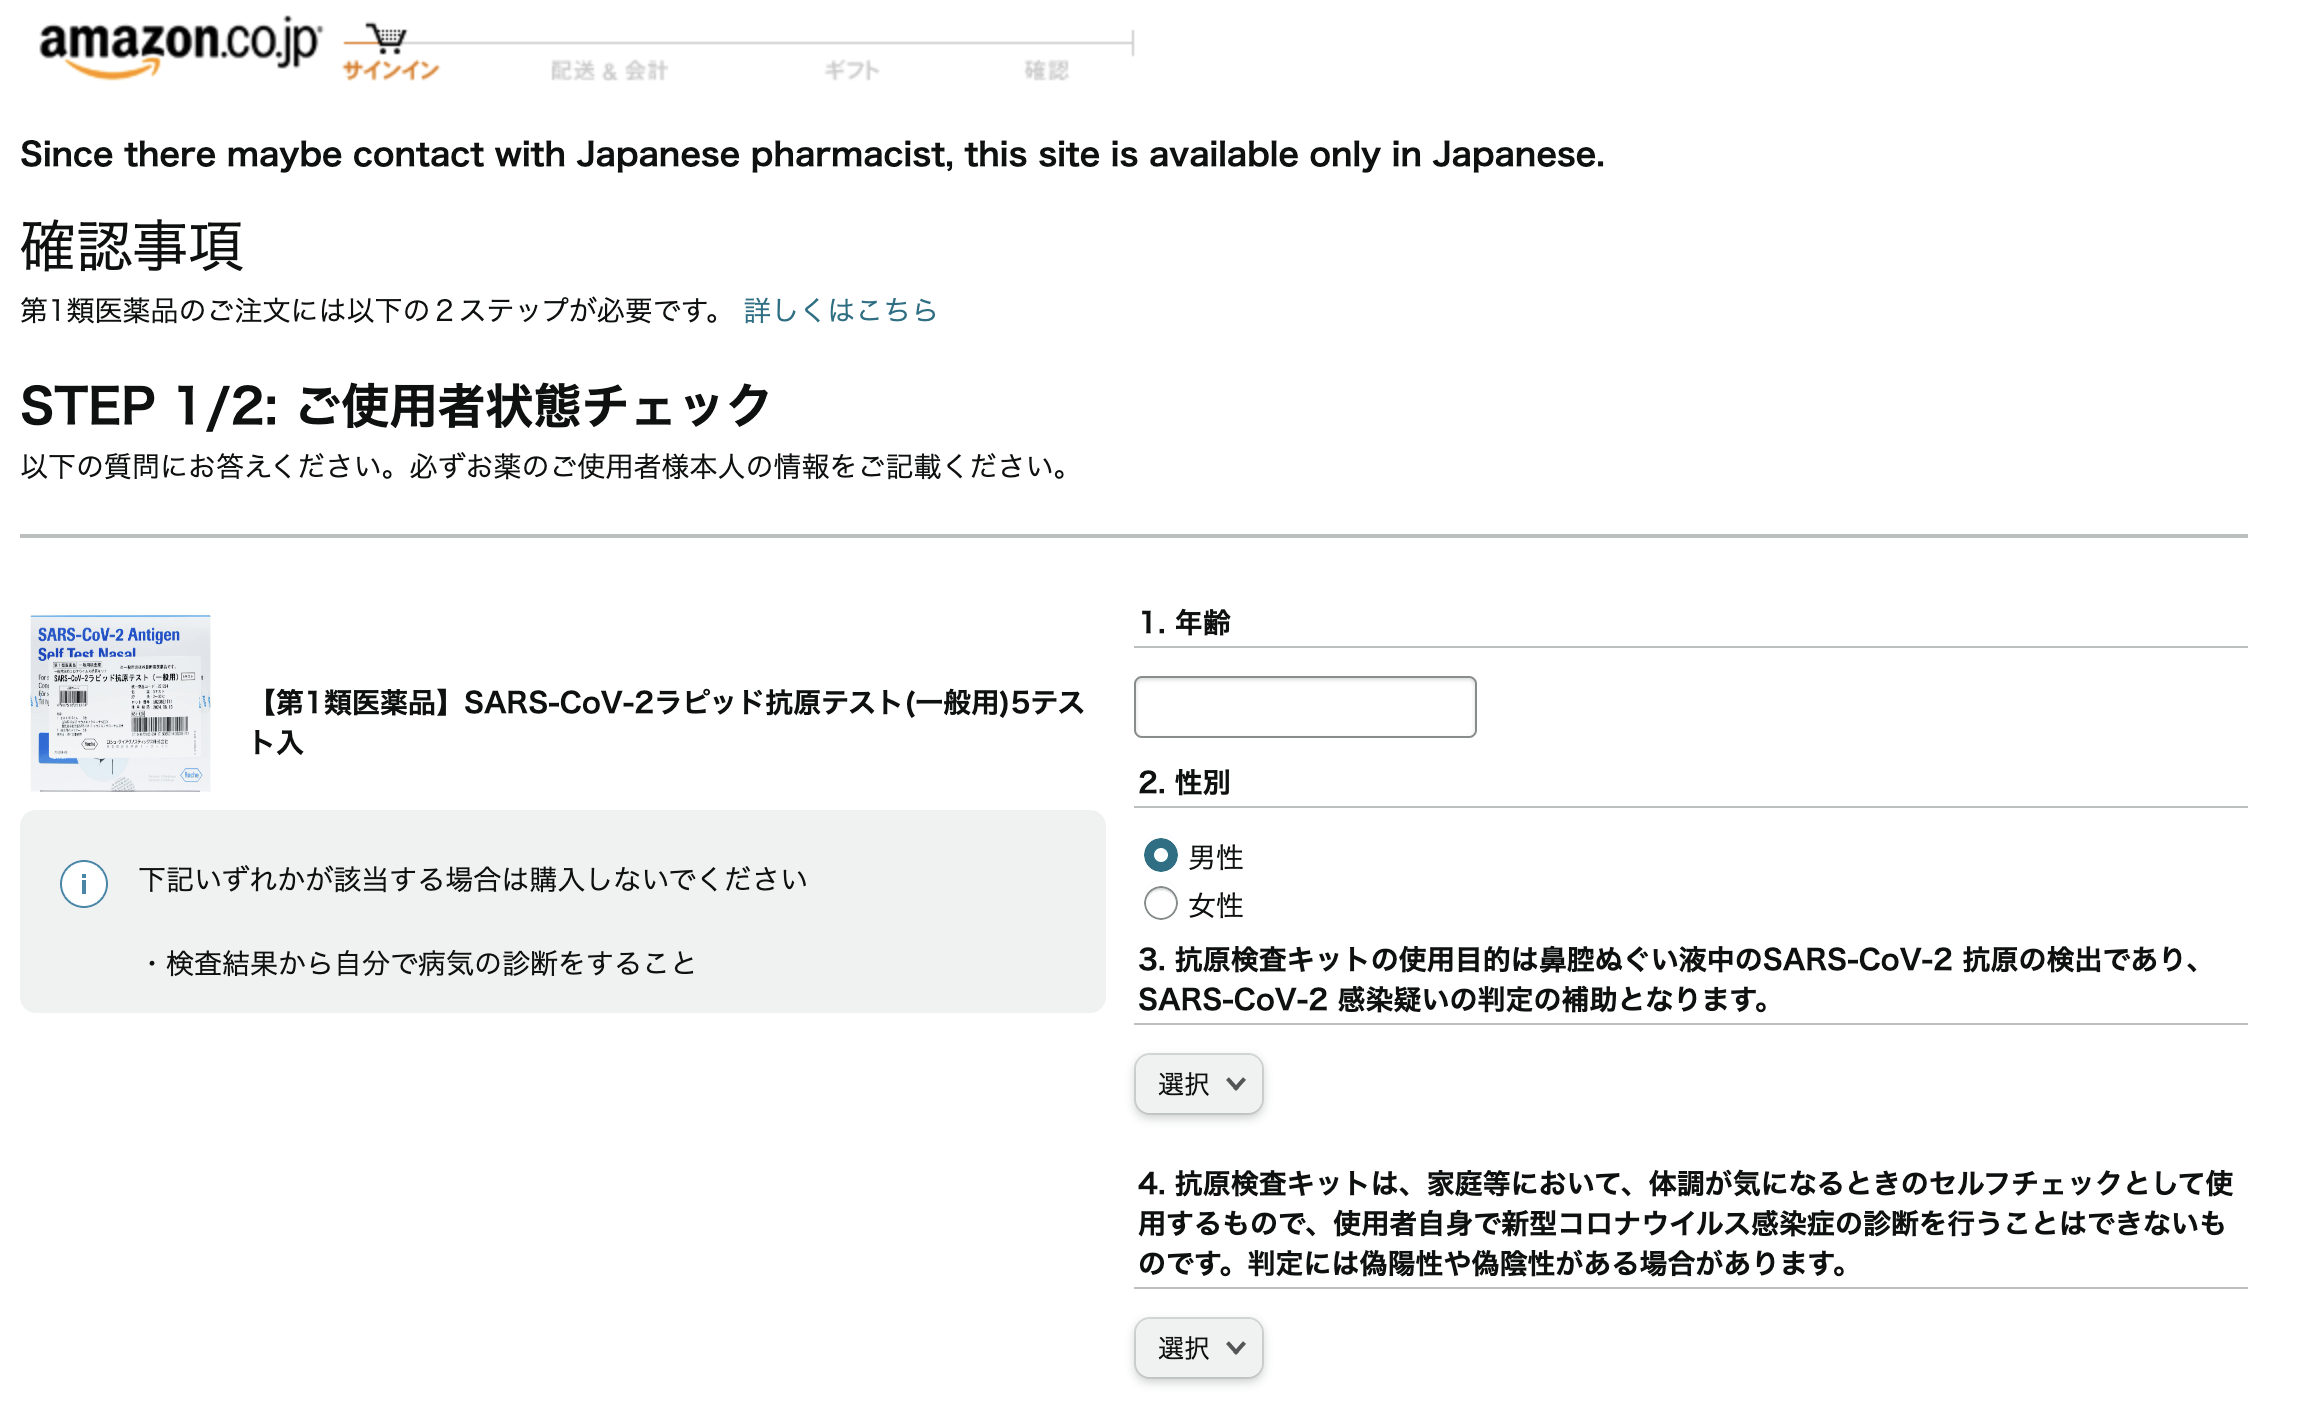
My direct involvement in this project was the creation of the mobile and desktop questionnaire page in which the customer can fill out the relevant and required medical information for pharmacist review.
In order for the questionnaire to be successfully injected into the checkout pipeline, a new attribute had to be created for ASINs with the class one medicine designation. During the checkout process, if the customer has any products with the OVER_THE_COUNTER_CLASS_ONE attribute set to “true”, a hook is triggered and the customer is redirected to the medical questionnaire page.
As you can see in the video above, the medical questionnaire has front-end JavaScript validation to mitigate mistakes before submission. Upon submission, although there are not the same kind of HIPPA-style laws in Japan as there are in the United States, it is still necessary to comply with Amazon’s customer data policy. Therefore, the customer’s medical data was to be stored encrypted in a secured database. As soon as the customer’s medical data is submitted and becomes available in the database, the medical information can be seen by the pharmacists on their internal management system that our team created. If there are no concerns with the information provided by the customer, the pharmacists can approve the order and the medicines will be shipped to the customer.
Just only a few days after we soft-launched this service, to our surprise, TechCrunch Japan reported on the new feature and questioned whether this is a sign that Amazon would become a huge player in online medicine space. Given how our world has changed so much only a mere four years later, it is very likely that more automation in medicine will come in the near future. Whether Amazon will be the one to invest in lead this undertaking is a topic of much intrigue.
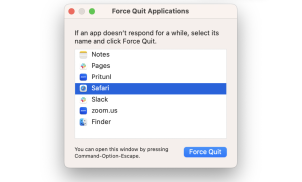
Continuing for about a decade at LINE, after a developer initiated a deployment (build, restart, rsync operation) in error or if said deployment was hanging or stuck (running for several hours with no progress), there was no automated way to force quit the process. In other words, in order for a developer to terminate his or her ongoing build, he or she must contact the Delivery Infrastructure team on Slack and make a request for them to SSH into the machine responsible for deployment (PMC) and kill the process.
One major problem of the manually killing the deployment in the console is that the Java process responsible for deployment spawns child processes which in turn also spawn child processes.
If only the grandfather process is killed, the child and grandchildren processes will be orphaned. If only the grandchild process is killed, then the parent and grandparent processes may continue to run.
So, it’s necessary to kill the whole generation of processes to avoid high CPU usage or memory leaks. Also, we want to avoid the manual operation of killing the process on the he server; the kill operation is quite dangerous and can disrupt unrelated service if the incorrect process id is inputted into the console.
We use Apache Executor to run the shell scripts responsible for build and restart.
Even though the Apache Executor contains an ExecuteWatchdog which can kill the process, but it does not have the ability to kill the process tree.
Also, due to constraints of the version of GWT that PMC is using, we are limited to Java 8.
The very useful Process API which allows for the killing of the descendants, is only available from Java 9 and above.
So, we had no choice but to subclass the Apache Executor, since the Process was only available through a protected method: protected Process launch(CommandLine command, Map<String, String> env, File dir)
Using this Process, we needed to find the process id, however in Java 8, for java.lang.UnixProcess, the pid field is private. (In Java 9, you can use Process::pid to get the process id). So the only way to get the pid here, unfortunately, is to use Java Reflection to get the process id. With this process id, then we can run this script to kill the process tree using the Java Process Builder.
#!/bin/bash
self=""
while getopts "p:" opt; do
case ${opt} in
p ) self="${OPTARG}" ;;
esac
done
function kill_process_tree() {
local generation=$(pgrep -P "${1}");
for child in "${generation}" do
if [[ "${child}" ]]; then
kill_process_tree "${child}";
fi
done
kill "${1}";
}
kill_process_tree "${self}"
This solved the problem of not being able to force quit builds or restarts running locally on the PMC machine, but there one other other edge case that were unsolved: newly created “remote build servers”, which are Kubernetes pods that have been allocated to run the builds remotely in a distributed fashion. These remote build servers help alleviate the CPU load of deployments on the PMC machine and distribute the work to multiple machines. However, we need to introduce the same kill logic to the remote build servers.
By using the formula: hash(projectId) % (n of remote build servers)
, we are able to find the exact machine that is executing the deployment.
I introduced a simple process service in the remote build service repository, which is basically contains a mapping of projectId to processId.
With the processId, we can use the above script to finally kill the process.
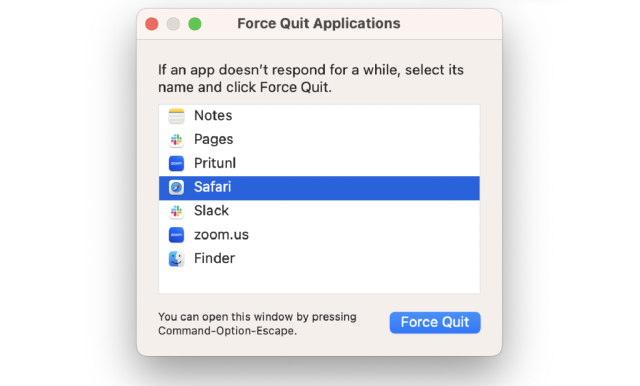
In conclusion, I decreased workload of manual operations on administrators as well as gave more flexibility and control to developers' deployment environment by providing a force quit feature.
In 2021, one of the pain points my new team I joined was having was that sticker, emoji, and theme creators needed a way to link their accounts for the purpose of giving recommendations to customers.
For example, let’s consider the company ‘Sanrio’ which owns the intellectual property of Hello Kitty, Gudetama, and Peanuts. Whenever someone is interested in Hello Kitty stickers, we may want to also want to recommend to the customer other Sanrio products such as Gudetama. In addition, we can find many examples of collaborations between intellectual properties across different companies, such as the Gundam or LINE friends. When a customer access the collaboration page of two or more intellectual properties, we want to give recommendations based upon each individual intellectual property.
A major hurdle we need to overcome was that the data for official (large corporations) and creators (smaller, self-published enterprises) were stored in two different databases: SQL and MongoDB respectively. Therefore, we agreed that we wanted to use a third database whose data is derived from the other two databases.
Given this ambiguous context, I started to look into graph databases, because they seemed to be among the best technologies that would allow us to connect entities together while giving us the flexibility to change the schema if need be. I first looked into Neo4J, which was the one of the first graph databases that comes up when you search on Google.
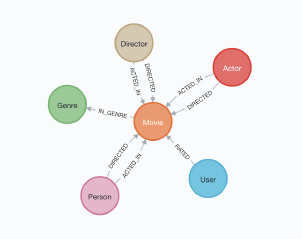
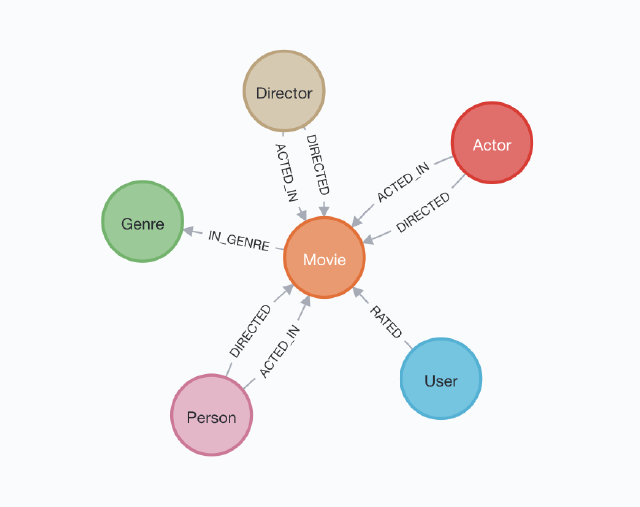
I was quickly able to write some code with some dummy data and create a graph representation of that data, which you can find below.
public void createCreatorAuthorRelationship(final String creatorId, final String authorId, AuthorType type) {
// To learn more about the Cypher syntax, see https://neo4j.com/docs/cypher-manual/current/
// The Reference Card is also a good resource for keywords https://neo4j.com/docs/cypher-refcard/current/
String createRelationshipQuery = "MERGE (c1:Creator { id: $creator_id })\n" +
"MERGE (a1:Author:" + type.toString() + " { id: $author_id })\n" +
"MERGE (c1)-[:IS_AUTHOR_OF]->(a1)\n" +
"RETURN c1, a1";
Map<String, Object> params = new HashMap<>();
params.put("creator_id", creatorId);
params.put("author_id", authorId);
try (Session session = driver.session(SessionConfig.forDatabase("neo4j"))) {
// Write transactions allow the driver to handle retries and transient errors
Record record = session.writeTransaction(tx -> {
Result result = tx.run(createRelationshipQuery, params);
return result.single();
});
System.out.printf("Created relationship between: %s, %s%n",
record.get("c1").get("id").asString(),
record.get("a1").get("id").asString());
// You should capture any errors along with the query and data for traceability
} catch (Neo4jException ex) {
LOGGER.log(Level.SEVERE, createRelationshipQuery + " raised an exception", ex);
throw ex;
}
}
The above code is a sample of how to create a relationship between author and creator entities in Neo4J!
I took some dummy data with 100 entities and created the below graph.
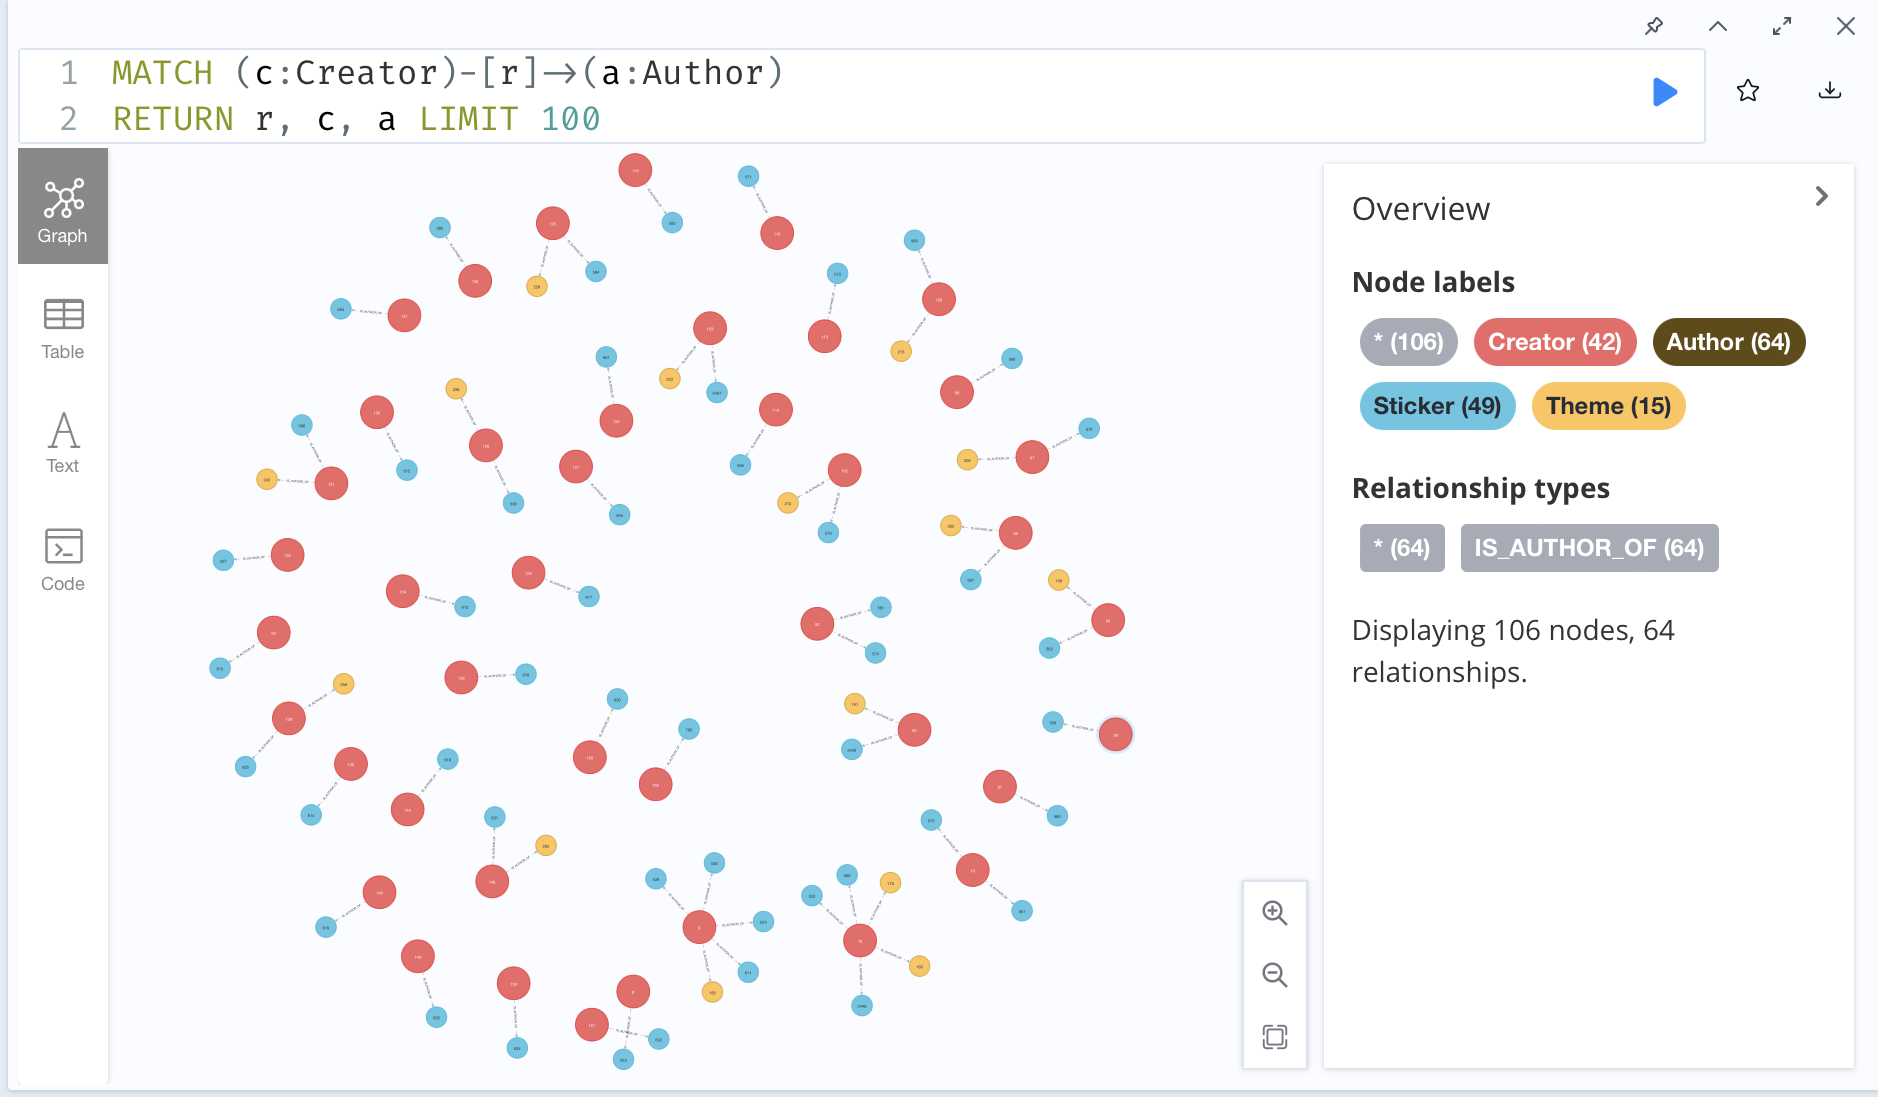
To create a connection between two authors, it is as easy as the following Neo4J statement:
MERGE (a1:Author { id: "538" })
MERGE (a2:Author { id: "553" })
MERGE (a1)-[:IS_SIMILAR_TO]->(a2)
RETURN a1, a2
And the following graph is created:
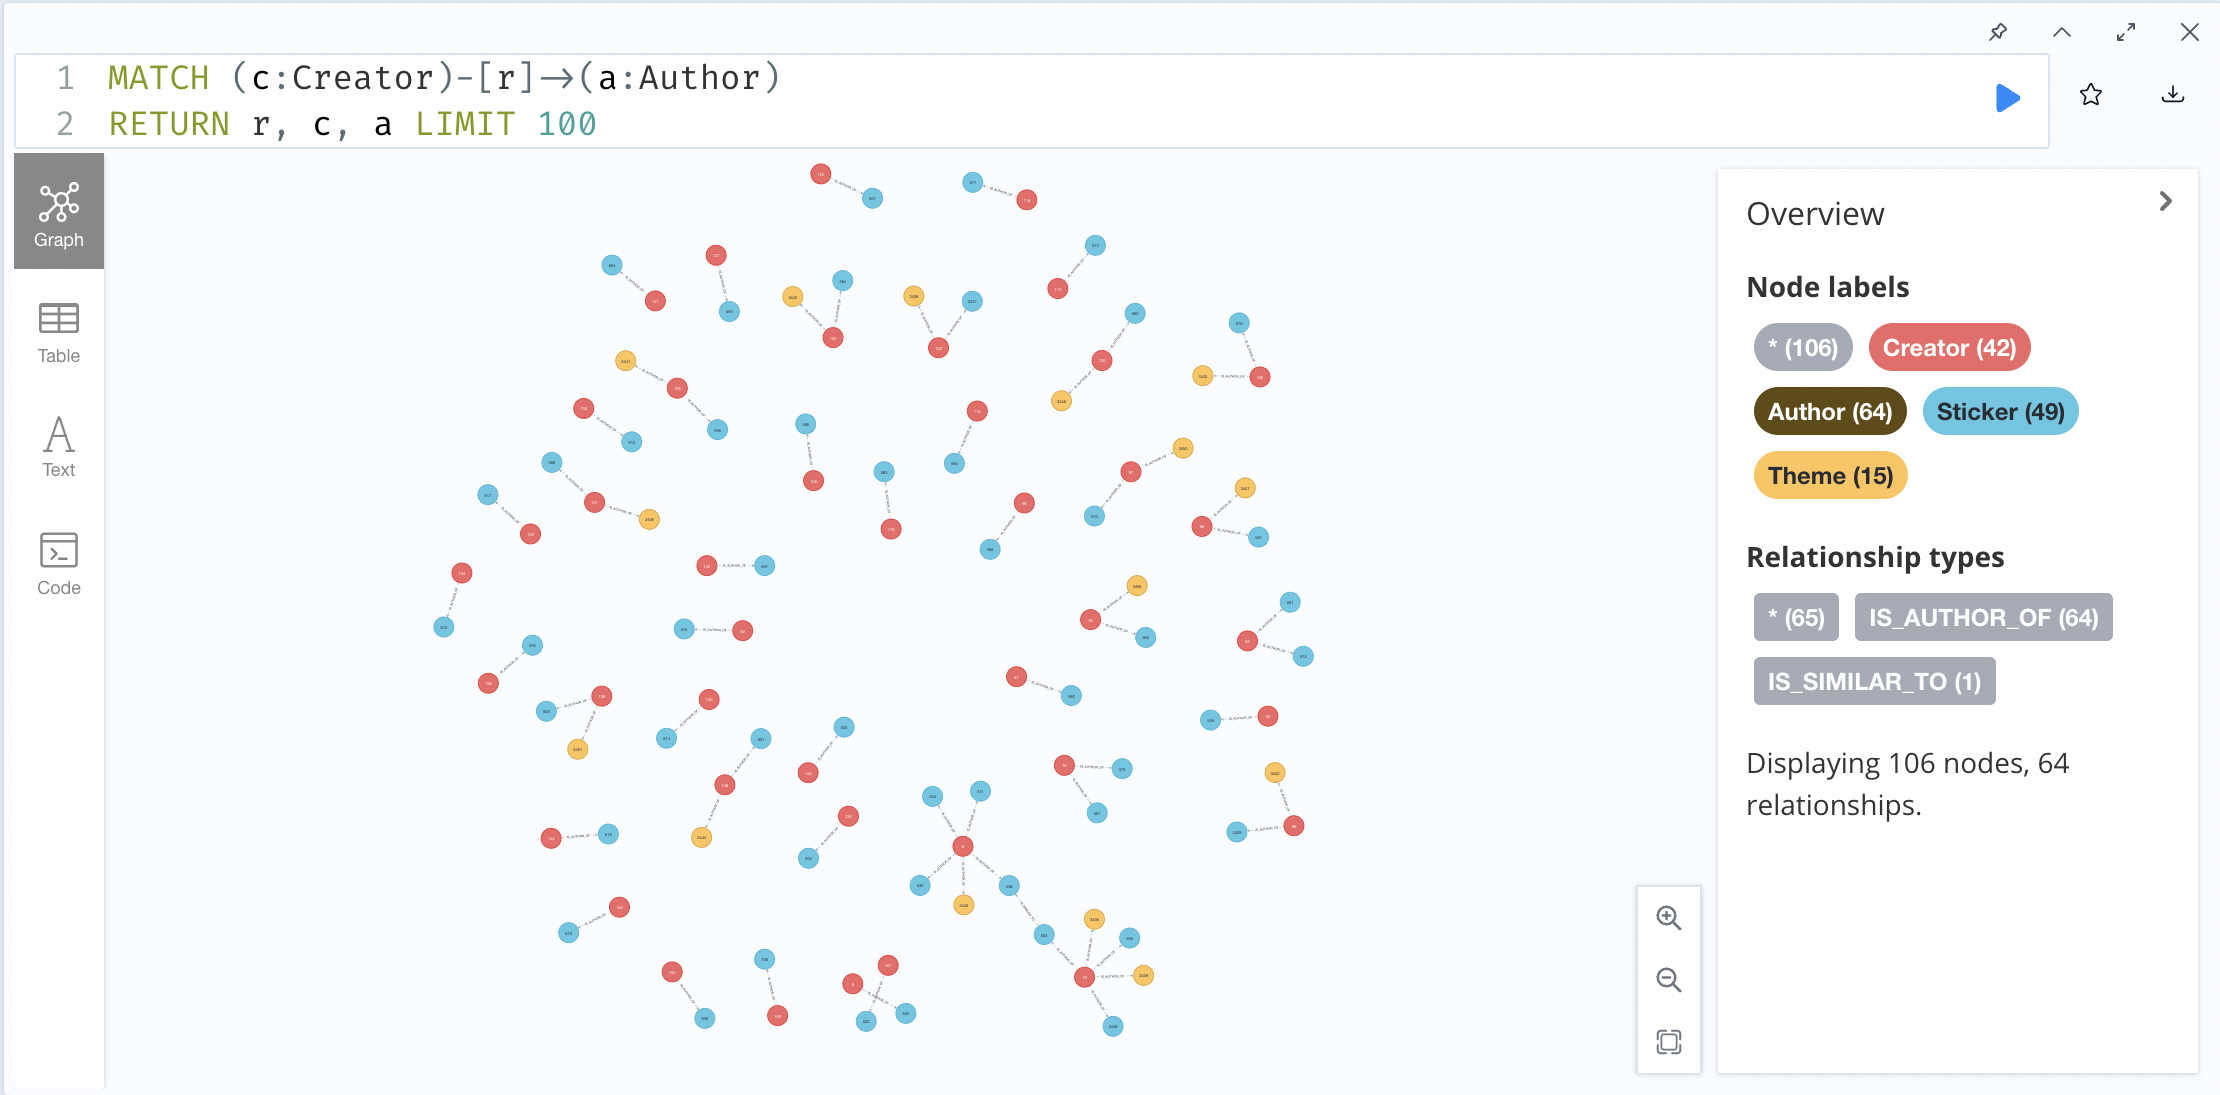
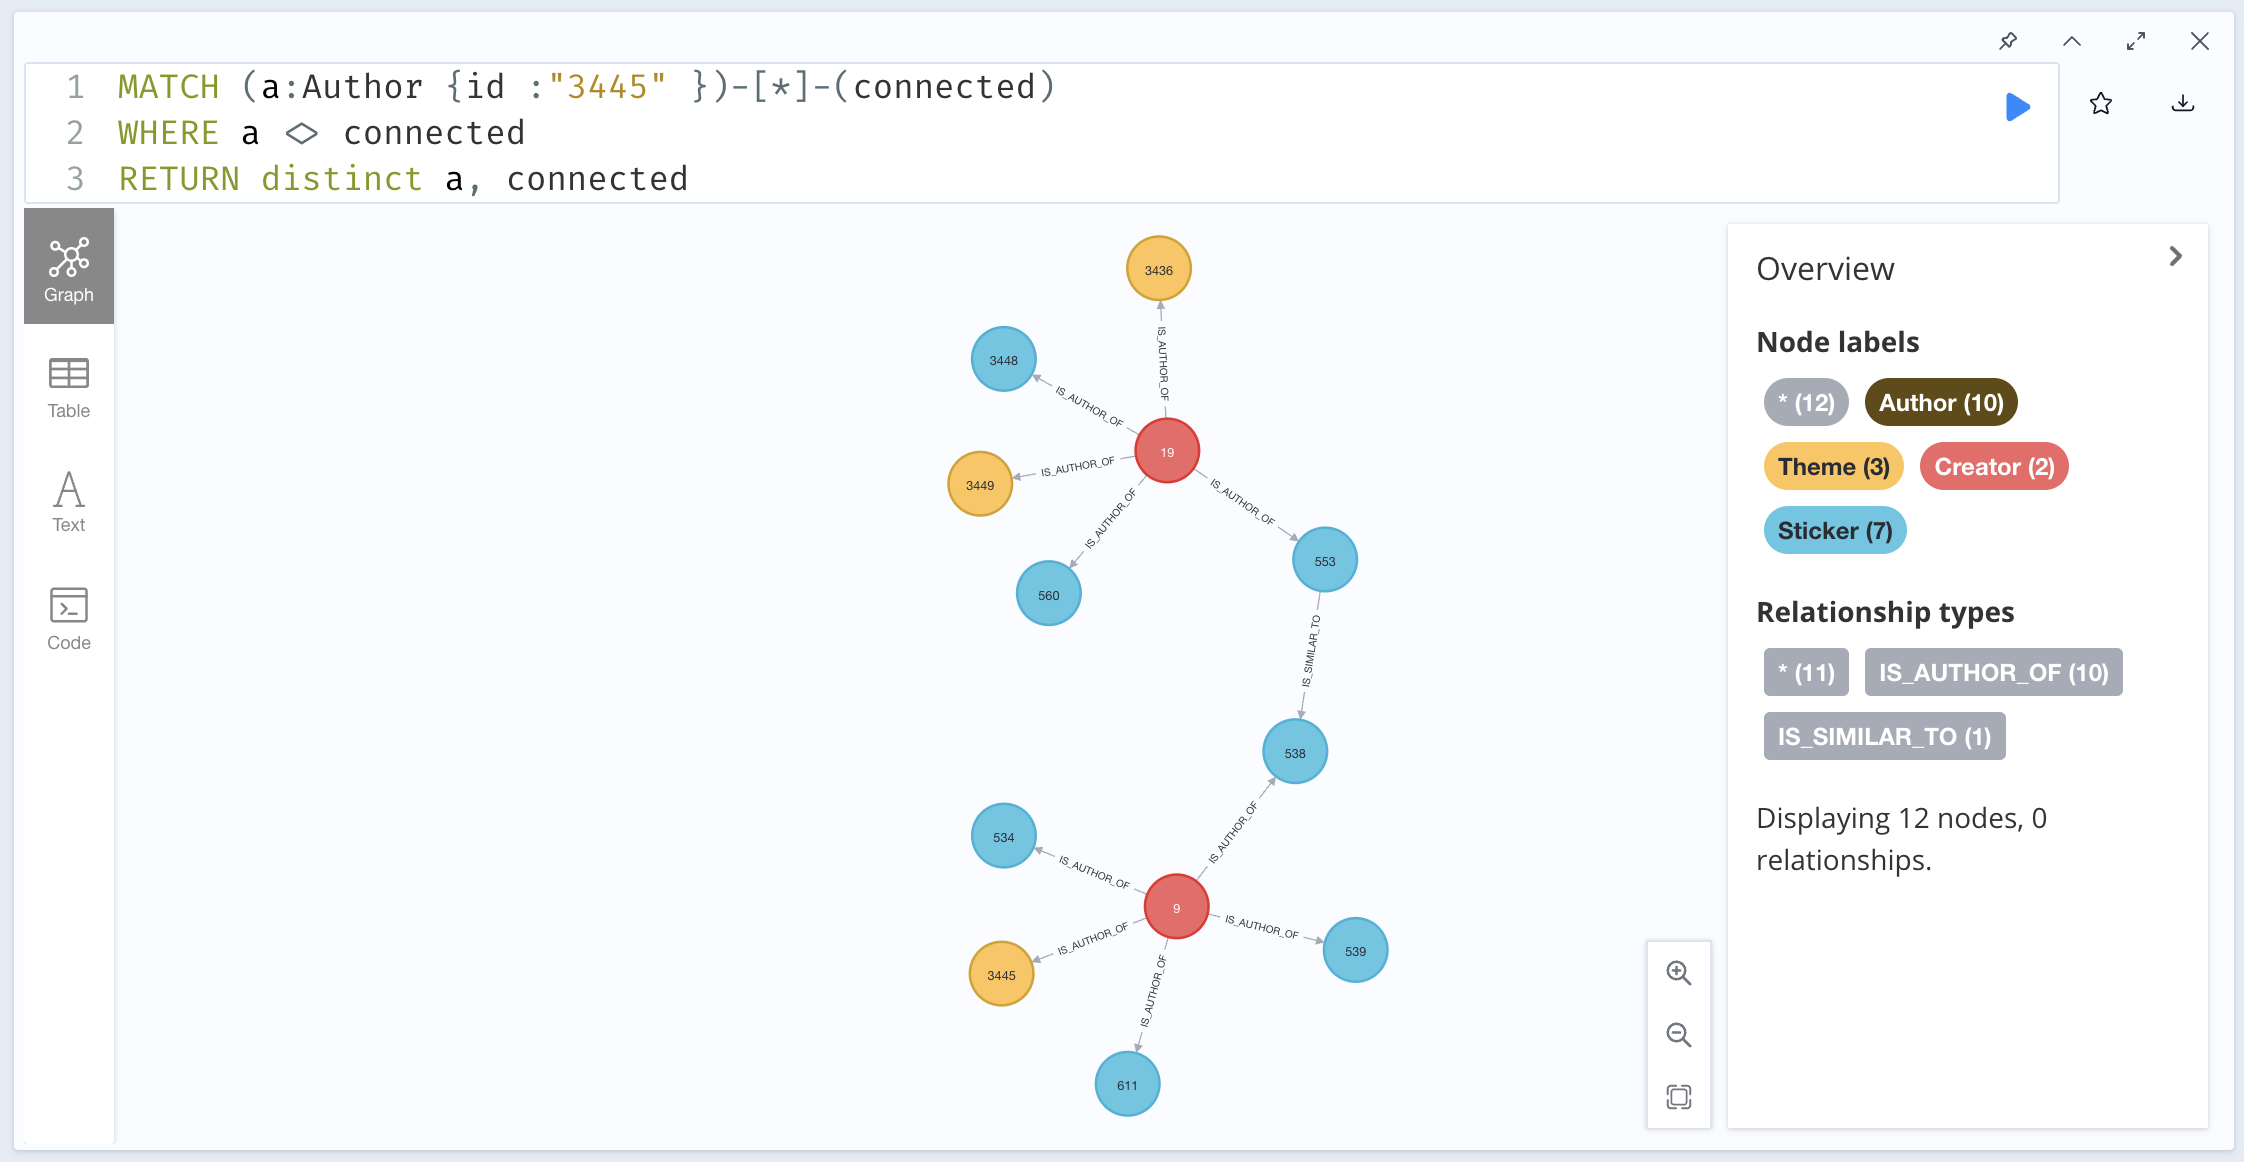
To find all the connected components to an author, the following query is executed:
MATCH (a:Author {id: "3445" }) -[*] - (connected)
WHERE a <> connected
RETURN distinct a, connected
And you can find the graph of the connected components below:
I made a presentation of my findings, which was well received by my department, however we later found out that the cost of Neo4J was too prohibitive for the budget and scope of the project. And so, I looked into a myriad of different graph databases, and I eventually came across JanusGraph. Over a period of a month, I created a rough system architecture using JanusGraph, created a graphical representation data using Gelphi, and wrote and delivered another presentation about my findings.
public static void createCreatorAuthorRelationship(JanusGraph graph, final String creatorId, final String authorId, final AuthorType type) {
final JanusGraphTransaction tx = graph.newTransaction();
final Vertex creator = getOrCreateVertex(tx, "CREATOR", "creator_id", creatorId);
final Vertex creation = getOrCreateVertex(tx, type.name(), type.getPropertyIdentifier(), authorId);
creation.addEdge("is_author_of", creator);
tx.commit();
System.out.printf("Created relationship between: %s, %s%n", creatorId, authorId);
}
private static Vertex getOrCreateVertex(final JanusGraphTransaction tx, final String vertexLabel, final String idKey, final String id) {
return tx.traversal()
.V()
.hasLabel(vertexLabel)
.has(idKey, id)
.fold()
.coalesce(unfold(), addV(vertexLabel).property(idKey, id))
.next();
}
The above code is a sample of how to create a relationship between author and creator entities in Janus Graph!
We can draw an edge between two authors with the id “558” and “553” with the following code:
public void createAuthorAuthorRelationship(final String authorId1, final AuthorType type1,
final String authorId2, final AuthorType type2) {
final JanusGraphTransaction tx = graph.newTransaction();
final Vertex vertex1 = getVertex(tx, authorId1, type1);
final Vertex vertex2 = getVertex(tx, authorId2, type2);
vertex1.addEdge("is_similar_to", vertex2);
tx.commit();
System.out.printf("Created relationship between: %s, %s%n", authorId1, authorId2);
}
private Vertex getVertex(final JanusGraphTransaction tx, final String authorId, final AuthorType type) {
return tx.traversal()
.V()
.hasLabel(type.name())
.has(type.getPropertyIdentifier(), authorId)
.next();
}
We can then find all the connected nodes from a single node with this gremlin query and output as a graphML:
TinkerGraph sg = (TinkerGraph)graph.traversal()
.V()
.hasLabel(type.name())
.has(type.getPropertyIdentifier(), authorId)
.repeat(__().bothE()
.where(P.without("a"))
.store("a")
.subgraph("sub")
.otherV()
).until(cyclicPath())
.cap("sub")
.next();
sg.io(IoCore.graphml()).writeGraph("subgraph.xml");
Again this presentation was well received, however an internal security review of a new technology such as JanusGraph would take longer than the expected time to implement(at least six months), so this idea was scrapped.
Going back to the drawing board, I was pushed to solve the same problem using technologies already used within the company, so I looked further into $graphLookup functionality in mongoDB.
Within a couple of weeks, I created a new architecture using mongoDB by referencing this website and these slides and wrote a detailed design document.
In that new document, defined the schema for vertex and edge below:
Vertex {
labels: ["official", "sticker"],
parents: {
"aliased" : { ObjectId("xxx")}
"related" : { ObjectId("yyy"), ObjectId("zzz") }
},
children: {
"aliased" : { ObjectId("aaa"), ObjectId("bbb"), ObjectId("ccc") }
},
properties: {
author_id: 12,
last_updated_by: "JPxxxx",
last_updated_date: "zzzz-yy-xx aa:bb:cc JST"
}
}
Edge {
labels: ["aliased"],
src: ObjectId("www"),
dest: ObjectId("xxx"),
properties: {
last_updated_by: "JPxxxx",
last_updated_date: "zzzz-yyy-xx aa:bb:cc JST",
}
}
In order to search for connected components, I used the graphLookup feature:
db.vertices.aggregate( [
{
$match: { labels: [$author_type, $author_subtytpe], properties: { "author_id" : $author_id } }
},
$graphLookup: {
"from": “vertices”
"startWith": "$children.aliased"",
"connectFromField": "$children.aliased",
"connectToField": "_id",
"as": “connected_authors”
}
},
])
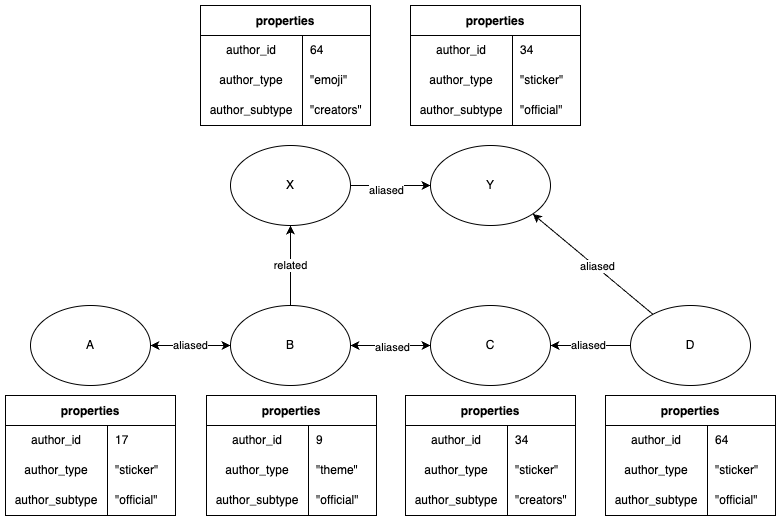
You can play with the above example using Mongo Playground here
Unfortunately, due to poor economic conditions in the tech industry and restructuring in the company, the project was cancelled. Hearing this news was hard to hear after putting so much effort in the design, but I really learned so much about graph databases and I would be excited to one day use them in the future.
If you’d like to reach me, you can also fill out the form below. I’ll do my best to get back to you as soon as I can!